Showing posts with label food. Show all posts

Tuesday, January 17, 2012

HOW-TO-TUESDAY: recipe makeover

Who doesn't LOVE brownies?  Chocolate-y, crumbly outside, chewy-ewwie-gooey inside.... and so-so sinfully decadent.... I mean, full of calories.

So, how can you have your favourite chocolate snack and NOT feel guilty after?  Easy.  Makeover your recipe.

With a few small changes you can cut the calorie count considerably and still get the fix you were looking for.

Today, I'm going to show you how I made over this recipe, from BAKER'S Chocolate and Kraft Canada.  The original recipe calls for a large amount of both butter and sugar.  By cutting these two ingredients down and adding one other thing, you can save yourself from indiscretion.

Here we go.
Julie's Skinny-ish Brownies

You'll need:
4 squares Baker's Semi-sweet Chocolate
1 tbsp Becel Salt-Free Margarine
1/4-1/2 cup sugar
1 ripe mashed banana (or 1 Motts snack cup unsweetened applesauce)
3 whole eggs (or 1 whole and 4 egg whites if you have cholesterol issues)
1tsp vanilla
1 cup flour (white, whole wheat or nutri-blend)

Melt chocolate and margarine in microwave for 1-2 minutes, stir til chocolate is free from lumps.  Add eggs, vanilla and banana and mix well.  Add flour and stir til combined.  If you're not totally counting every calorie, fold in a bunch of chocolate chips too, maybe about a half cup ;)

Pour into a 13x9 greased foil-lined baking dish.  Bake for 25-35 minutes in a preheated 350 degree oven.  Test the brownie to make sure they're done by inserting a knife or toothpick.... you know the drill.

They should resemble something like this....


Judging by the 'oohs and ahs' I got from the family, I'd say they were a hit.  The banana adds a bit of flavour that melds well with the chocolate and gives that extra hit of sweetness.  Hope you like them too!

Have a fantastically fudge-y day  ;)

Tuesday, November 29, 2011

HOW-TO-TUESDAY: rosemary butternut apple soup

It's the time of year when all I want to eat is soup.  Do you ever feel that way?

Here's a very simple recipe that tastes de-lish-us!  And also happens to be one of my very favourite fall recipes..... YUMMMMM!

ROSEMARY BUTTERNUT APPLE SOUP


You'll need:

7-8 cups of peeled and cubed butternut squash
2-3 apples cubed (peeled or not, your choice)
2-3 cloves garlic chopped
1 medium onion diced
4-5 cups chicken broth
1 tsp rosemary
fresh ground pepper
salt

Here's the how-to: 
Throw everything into a large soup pot.  Bring to a boil, then simmer until squash is fork tender.  Here's where you choose how to finish the soup.  You can either mash with a potato masher and have a textured soup; or use an immersion blender and puree.  I like my soup a little chunkier, so I just use my potato masher.  You can also, at this point, add either cream, milk, evaporated milk, coconut milk or a neutral milk alternative (soy, almond, etc.) to give the soup a 'cream of' consistency.  Sometimes I add the milk, sometimes I don't.... I enjoy it either way.

This soup freezes very well.  However; here's a tip - freeze without the milk added, it tends to separate and look curdled when thawed and reheated.  Once thawed, heat the soup and add the milk at the end, warm it up, then serve.  Enjoy!

Have a fantastic Tuesday everyone  ;)

Tuesday, November 22, 2011

HOW-TO-TUESDAY: homemade chocolate syrup

I don't buy milk through our school's milk program.... Don't get me wrong, I think it's a great program and fundraiser; but, with two kids (and next year three) to pay for.... it's an added expense that just doesn't fit into our budget.... I send cheese, yogurt or chocolate milk from home.... this is what works for us.

I also don't buy cartons of chocolate milk either.  It's not cost effective and it's just an invitation for the kids to drink it way too often, because once opened, it must be finished before it sours, right?  So, chocolate milk in our house comes from the plain skim milk we buy (which we always have an abundance of) and chocolate syrup.  I can control the amount of chocolate (sugar) that goes into every glass.... I like that. And, it's cost efficient.

Anyhow, if you're a baker, then you should have everything already in your cupboards to make this easy recipe....

Here's the how-to:

Whisk together in a pot,  1/2 cup cocoa, 1/4 to 1/2 cup sugar (or powdered sweetener of your choice), pinch of salt, and just over a 1/2 cup of water.   Bring to a boil then simmer for 3-5 minutes, stirring constantly.  Let it cool, then pour it into a container and store in the fridge.  Should make just over a cup of syrup.  Use it just as you would commercially bought chocolate syrup.  Alternatively, you may also whisk this all together in a microwave safe bowl and heat for 30 second intervals, stirring after each interval until the desired consistency is reached.  You can make this as thick or thin as you like.

The added bonus; YOU control the sugar and there are no added preservatives.... and if you ask my guys, they like it just as much as store bought.  WIN-WIN!

Have a fantastic Tuesday, folks   ;)

Sunday, November 20, 2011

FAMILY DAYS: yummy-ness = togetherness

It doesn't matter how busy our week was, or what conflicts we've had, Sunday mornings are always reserved for this....


On today's menu:  pumpkin spice, o.j. and earl grey.... cartoons and TONS of snuggles.... life is good.
Have a fantastic family day  ;)
Tuesday, November 15, 2011

HOW-TO-TUESDAY: marshmallow pops

Just wanted to share a super easy and super fun little treat that can be dressed up in so many different ways.... The Marshmallow Pop.

Here's what you'll need:
- marshmallows
- skewers, popsicle sticks or treat sticks
- melting chocolate
- decorating sugar, sprinkles or other candies


First, skewer marshmallows.


Melt chocolate.  I generally use my microwave for this.  Heat melting chocolate at 50% power for 30 seconds at a time, stirring after each increment.


For the next step, I like to remove the stick from the marshmallow and dip it into the chocolate, then replace it into the marshmallow.  It will harden into place helping to keep the pop intact.  Then dip the marshmallow into the chocolate.


Decorate as desired.


Allow to cool.  Pour rice or dry beans into a container and insert the pop sticks into it to keep them upright to dry.

If you're giving the pops away as a treat for a birthday party or class party, wrap in sucker bags and tie with a nice ribbon.  These are the ones I made for my little lady's birthday party last Sunday.... I had fun making them, and I can't wait to make more for other holidays, birthdays or a special treat any day!


Think of all the possibilities!  Check out these fun and tasty treats!

http://www.verybestbaking.com/recipes/128879/Marshmallow-Pops/detail.aspx

http://kitchenrunway.com/marshmallow-pops/

http://maddycakesmuse.blogspot.com/2010/10/halloween-marshmallow-pops.html


http://bestfriendsforfrosting.com/2011/10/winter-snowman-marshmallow-pops/

Have a super fun day  ;)


Thursday, November 10, 2011

Tuesday, October 18, 2011

Interesting.... no, Pinteresting....

I am in love with Pinterest.... if you don't know what it is, check it out, it's pretty self-explanatory....  Think brainstorming-idea centre-organizing thoughts.... Ahhh, all in one place....

Anyhow, I've been having a great time browsing everybody's idea's and adapting them to my own life/home/what-have-you....  Just thought I'd share some of the Pinteresting things I've found of late....

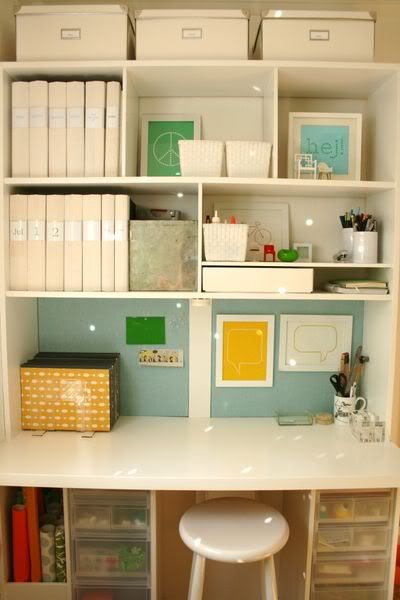
Organization - Pinterest

Peacock tutu tutorial - via Pinterest

Fairy lights - found on Pinterest

Headband tutorial - Pinteresting

Chocolate chips and raspberries - via Pinterest

10 things to make with cereal boxes - found on Pinterest

Pinterest is for anyone looking to organize and share their thoughts.... have a look, you may be inspired to do something you didn't even know you wanted to do....

Have a great day everyone ;)

Monday, October 17, 2011

Cranberry yummy....

I spent my Sunday morning making super delicious pumpkin spice pancakes for the monkeys.... Sunday's are always pancake breakfasts.... I; however, generally still have my same old boring oatmeal.... somehow my day seems not quite right if I don't have it, weird huh?

Anyhow, I used this recipe for the pancakes, that I found pinned all over Pinterest.... and judging by all the "Mmmm's" coming from my breakfast table, I'm guessing they are everything they say, and more!

Then, being inspired by the vintage jars I brought home Saturday, I decided to do some canning.... cranberry sauce to be exact.  I picked up 2 bags of cranberries last week when I was grocery shopping.... I love cranberry sauce, and it's so much better homemade.... but, since I'm the only one in my house who likes it, much of what I make goes to waste.  So, I decided to do some preserving in small jars....


Here's my recipe for cranberry sauce:

You'll need:

1 bag of cranberries (I use ocean spray)
1 cup orange juice (with or without pulp)2/3 to 1 cup sugar (white or brown)
1 to 1-1/2 tsp cinnamon
1/2 tsp nutmeg
(optional) grated rind from one orange

Mix juice, sugar, cinnamon, and nutmeg together in a saucepan, heat to boiling.  Once liquid is boiling, add the cranberries and grated orange rind.  Lower heat to medium and allow cranberries to simmer roughly 10 minutes.  You'll hear the cranberries popping as they heat and the liquid will begin to thicken.  You can mash the cranberries is you wish or leave them, just depends on the texture you want.

This makes just over 2 cups of sauce.  Sauce cooled to room temperature can be stored in the fridge for up to 2 weeks, or frozen for 6 months.  If you want to preserve it, you'll need a hot water canner, sterile jars with lids and rings, funnel, jar lifter.  Make sure hot sauce goes into warmed jars, wipe jar rims and seal leaving at least 1cm. head space, process in a hot water bath for at least 10 minutes (remember:  hot jars go into the canner with warm water).  Remove being careful not to jostle jars about and let rest til cooled.  Store in a cool, dark place.

And there you have it!  Yummy cranberry sauce ready to enjoy whenever you like, or to give as gifts!  The bigger vintage jar and the half full jar went straight to the fridge for our upcoming belated Thanksgiving dinner with my in-laws, who will be arriving this coming Wednesday....


Have a great Monday everyone ;)

Sunday, October 9, 2011

Did you know....

the easiest way to get broken eggshells out of a cracked egg is to use.... 


a broken eggshell?  

Now you know.  And life from here on out will be so much better :D

Have a great sunny Sunday everyone ;)

Monday, October 3, 2011

Healthy granola....

While digging through the fridge one day, I came upon a lonely bag of shredded coconut.... hmmm, what to do with the flaky stuff?  Well, after enjoying a few handfuls straight from the bag, I decided to make granola bars.  Good idea, right?  I thought so too  :D

As you can see, as the official taste-tester, I had to make very, very, very sure they were fit for little monkey consumption.... and it took exactly three squares to determine that they did, indeed, pass my rigorous tests; you know - proper density, correct balance of flavours and general yummy-ness (it's a technical term, look it up)....


So, here's the recipe; which, by the way, can be adapted for use with whatever you have lurking in your cupboards.... as long as the binders are in place, you're good as gold :)

3 Monkeys Granola

2 cups oats (just not minute oats)
1/2 cup brown sugar (did you know you can make your own? what!?)
1/4 cup wheat germ (or oat bran... or not, totally optional)
1 tsp cinnamon
pinch cloves
1/4 cup cranberries (our fave are raspberry flavoured)
1/4 cup shredded coconut (sweetened or not)
1/4 cup sunflower seeds
1/2 cup chocolate chips

1/2 cup honey (we use buckwheat for a stronger flavour)
1 egg
2 tbsp oil (whatever you have is fine)
1/4 cup unsweetened applesauce (unsweetened flavoured is great too)

Here's the really, super difficult part, I hope you're ready for it, please pay very close attention....

Dump all of the dry ingredients in a big bowl and mix together....

Throw the wet ingredients in a smaller bowl and mix well....

Pour the wet into the dry and combine.... phew!  Now, that was a toughy ;)

Pour it all out onto a parchment lined jelly roll pan (aka cookie sheet).... or, grease your pan VERY WELL as this stuff has the power to stick like super glue!  Now, at this stage, it should be a little less than 1/2 inch thick on your pan, but again, this is up to you Miss Baker-Babe, I like mine about this thickness so I don't end up with super crunchy granola.... I hate that stuff!  If you leave it a little on the thicker side, you can control the crunch factor a bit better.... I also like to manipulate mine into a very neat and tidy rectangle using my parchment to shift and move the stuff; to get it flat and even on top, I just use my hands (clean hands, of course)....

Bake in a preheated 350 degree oven til lightly golden.... sorry, I can't give you a definite time as I do not work that way in the kitchen.... maybe check on it after 10-15 minutes then every couple minutes after that.... that's the best I can do folks :)  My oven temp runs very hot so my times are always off.... (eagerly awaiting the day it decides to leave this world).... As with all of my recipes, interpret them whatever way you please, because that is the beauty of cooking, right?  You can loosely follow someone else's directions and create something that's your very own.

Happy baking all  ;)

Monday, September 19, 2011

Lots going on....

I have tons of stuff to show you over the next couple of weeks.... most of it will be re-finished, re-furbished, re-worked, re-purposed for my girl-monkey's room.  I've managed to pick all of her large bedroom items:  bed, dresser, magazine rack (a little project that's going to house some special items), chair... at second-hand shops, used and consignment shops!

My middle monkey, while watching American Pickers last week, turned to me and said "Mommy, you're like an American Picker guy."  I was so surprised that he would compare the way I like to shop for things, to these guys.... I guess when you think about it, I am kinda-sorta like a picker.  Only difference is that I'm not educated when it comes to antiques; and I'm really only trying to find things for my home that fit my vision and aren't cut from todays' cookie-cutter manufacturers.  Ok, so maybe I'm not a picker.... I'm more of a junk buyer :)

Anyhow.... Here's an itty-bitty piece of the dresser, we'll call this the before shot....


Sorry about the picture.... right now, it's living in the garage piled high with, well, garage-type-stuff.  I picked up this nice stick of wood at a consignment shop in my own little town.  Heavy solid wood, well-constructed, in near mint condition, complete with dove-tailed drawers.... and the price, you ask?

$75.00; I know, it may seem a little more money than what I'd normally like to spend.  But, when it comes to furniture of this construction, there's no way you could find a new piece even close to this quality at a reasonable price point.

Of course, I'm going to rough it up, strip it down, re-paint it and give it a lift with some new (or used) hardware.  I'm thinking the colour will end up being some sort of creamy white.... I'm hoping to remember to take step-by-step photos when I start the re-furb.... but, that remains to be seen.... knowing me, I'll remember halfway through the process.

Aaaanyway, it's dull and rainy here today, the perfect day for makin' soup, I say.  On today's menu:  Butternut, sweet potato and red apple soup.  A great soothing fall soup that will go well with tonight's meatloaf and rice dinner.  Yum!

Have a great day all ;)

Wednesday, August 10, 2011

Yummy, I hope....

So, I've always loved the idea of canning my own food. In the past I've done some preserving; like freezer jams, apple butter, apple sauce, strawberries (frozen).... Well, yesterday, we took a trip to the St. Jacobs Farmers Market with some friends.... I love St. Jacobs and the market. It's a cute little town full of little shops surrounded by a very large Mennonite population, and the market is the largest I have ever been to. It's a feast not only for the eyes, but every other sense as well.

My kids love checking out all of the booths; food, craft, and everything else in between.

Anyhow, I've always wanted to try pickling beans.... Hot, spicy beans. I purchased some beautiful yellow beans for $3.... TONS of beans.... ok, so not TONS; but enough to do 2 quart jars. I just kind of winged the recipe. You know; 1 part vinegar, 1 part water, salt, peppercorns, hot chilis, LOTS of garlic and a sprig of dill in each jar, processing.

And, voila! Check it out!


If nothing else, they sure are purdy! I'll know in 3 weeks if I've got a winner or a flub.... Mr. Monkey is not totally convinced that my 'winging it' will pan out. Ahhhh, recipe-shmecipe, who needs one.... Ummm, maybe I should hold that thought for about 3 weeks....

Have a great day everyone ;)