I've had this sweater for a few years.... it's soft and cottony and I love it.... but.... I never wear it. One of those items you hang onto in hopes of one day wearing again.... But, honestly, do those days ever come? Usually not for me....
So, I took this as a sign.... A makeover kinda sign!
Here's what went down:
I took this 100% cotton American Eagle sweater that I bought for the low-low price of $9.99 (I know!)....
And started by doing this....
Then this....
Then this....
And this....
And this too....
And voila! A new cardi from a sweater that I loved....
Yay!
Showing posts with label crafts. Show all posts
Tuesday, January 24, 2012
Thursday, January 19, 2012
BESTIES OF ETSY: love day is coming
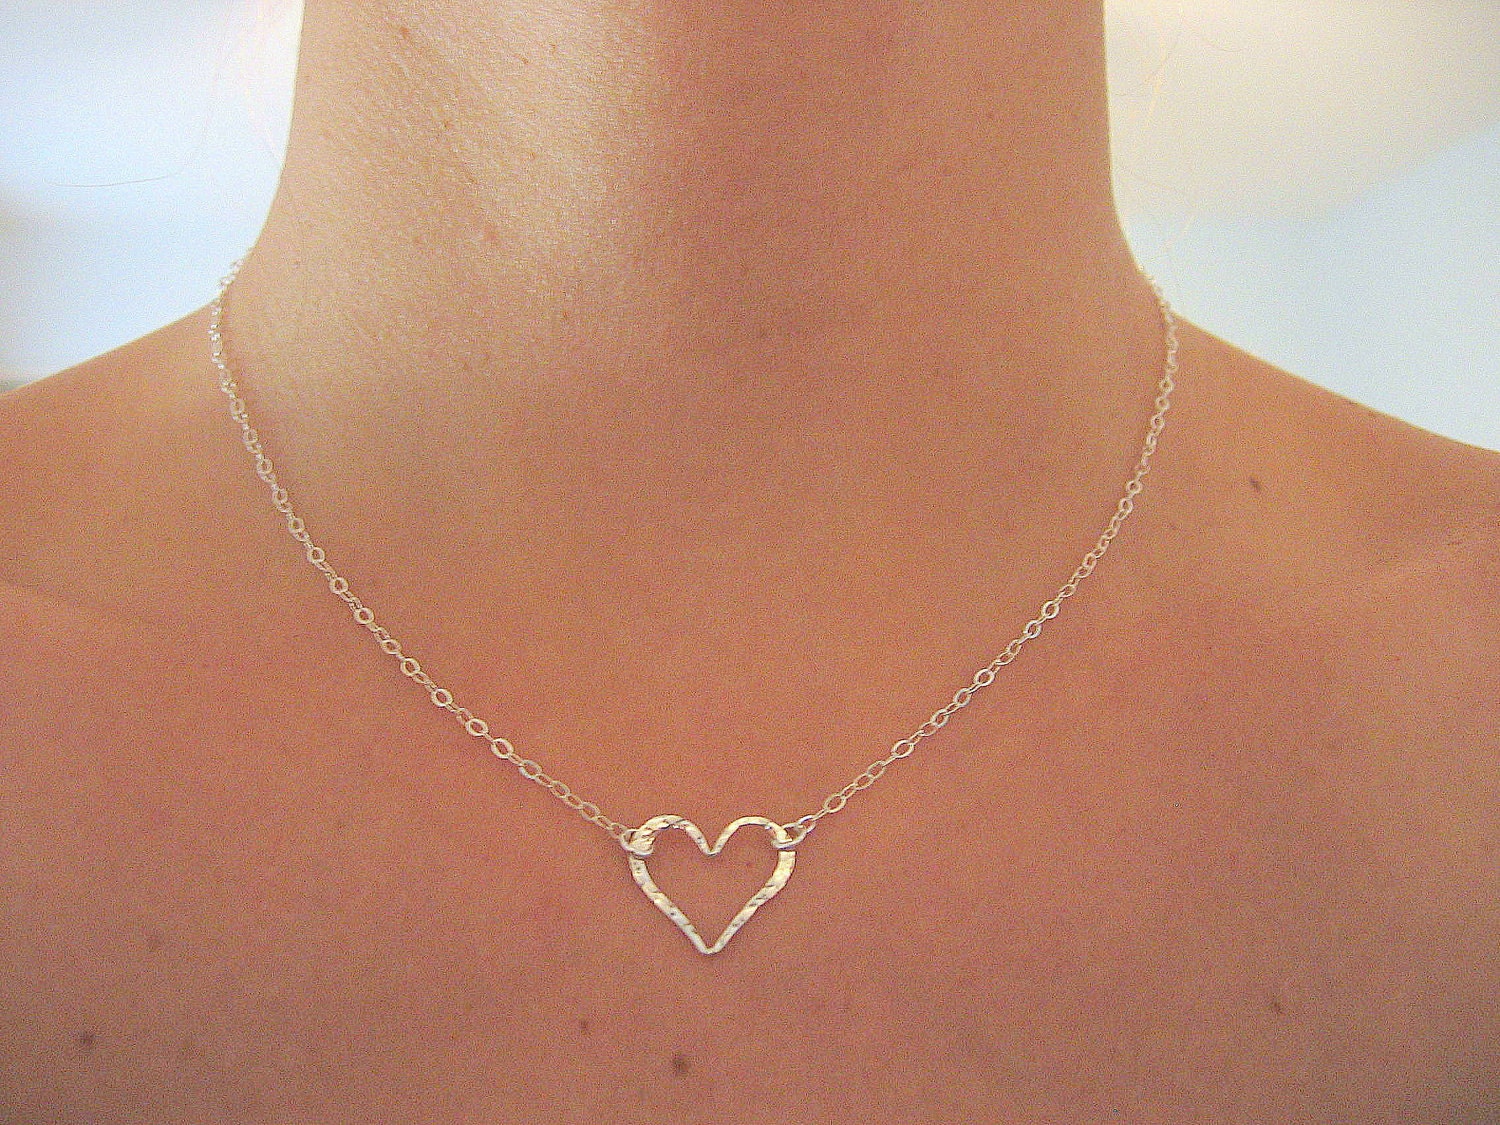
Hammered Heart Necklace, by Juliana W Jewelry
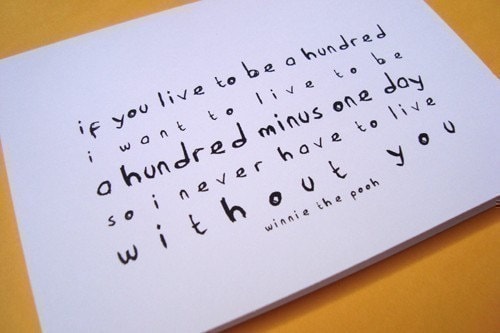
Winnie the Pooh Quote Valentine Cards, by Letter Happy
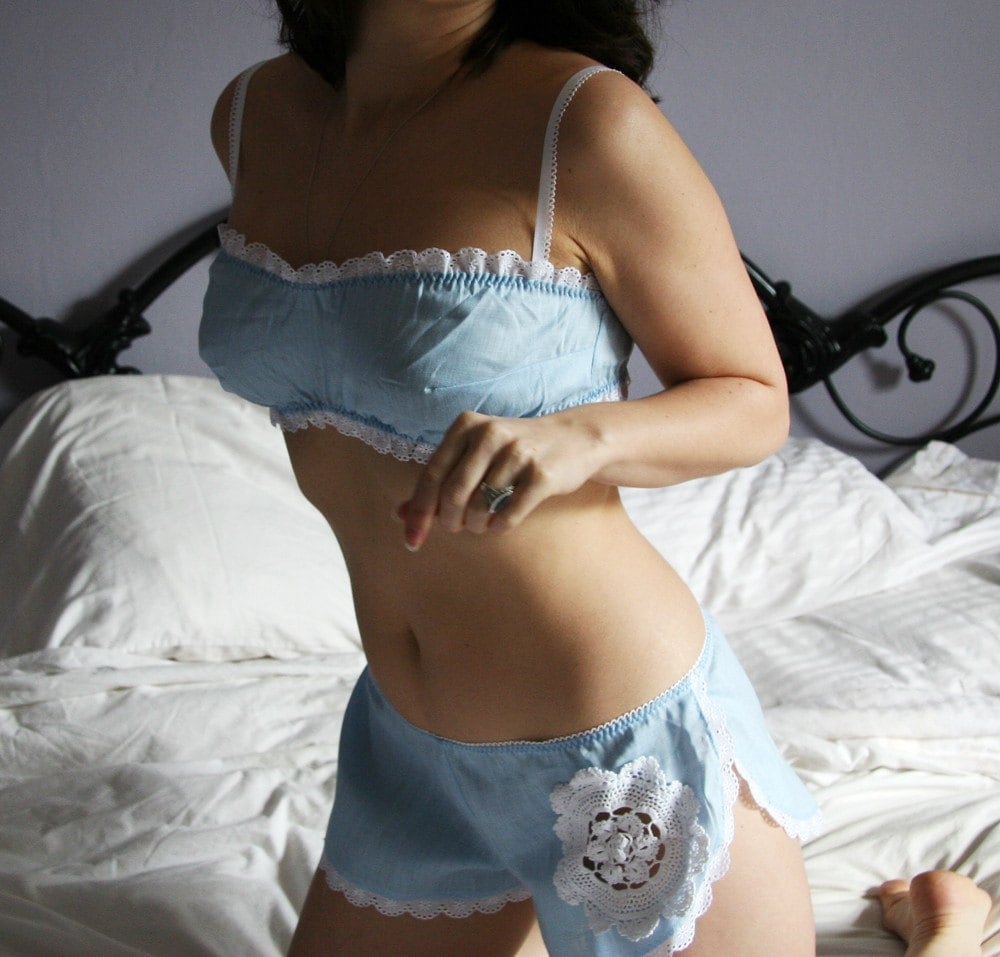
Linen Lingerie Set, by Sandmaiden
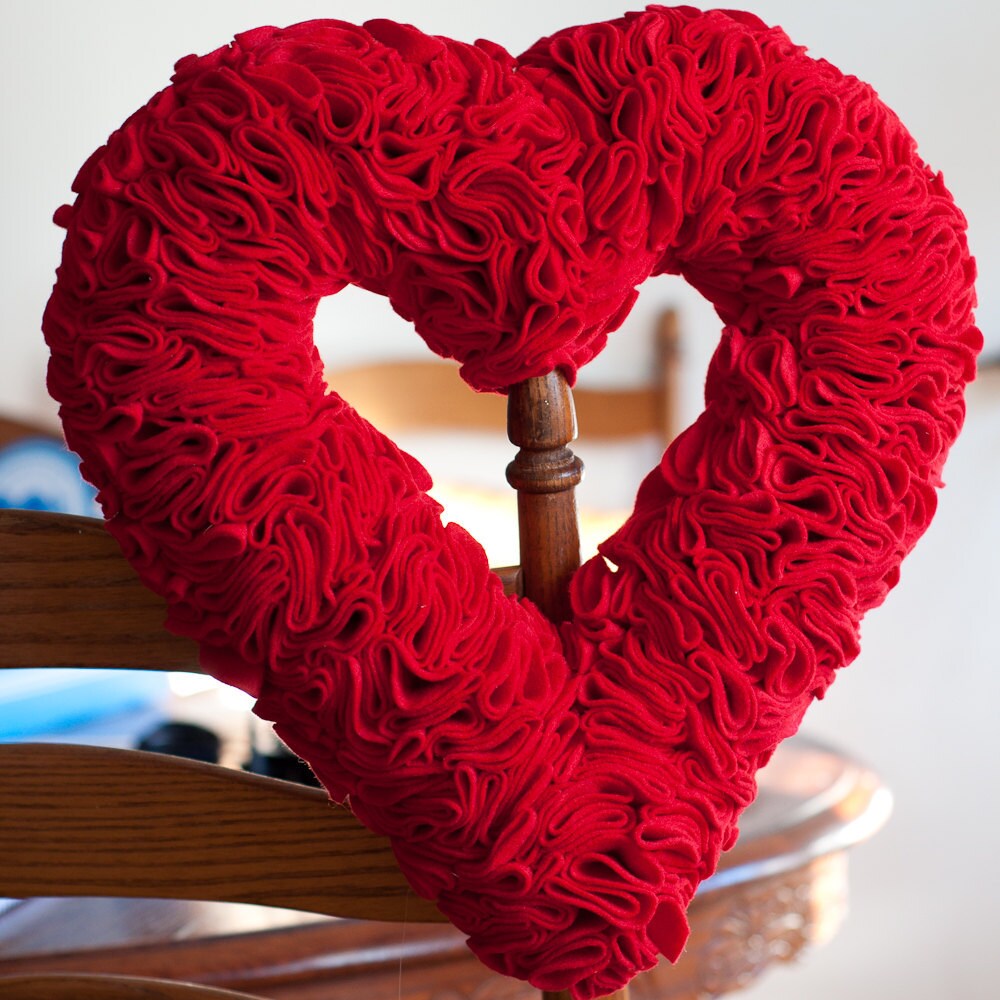
Beautiful Red Valentine Wreath, by Sophie Reena
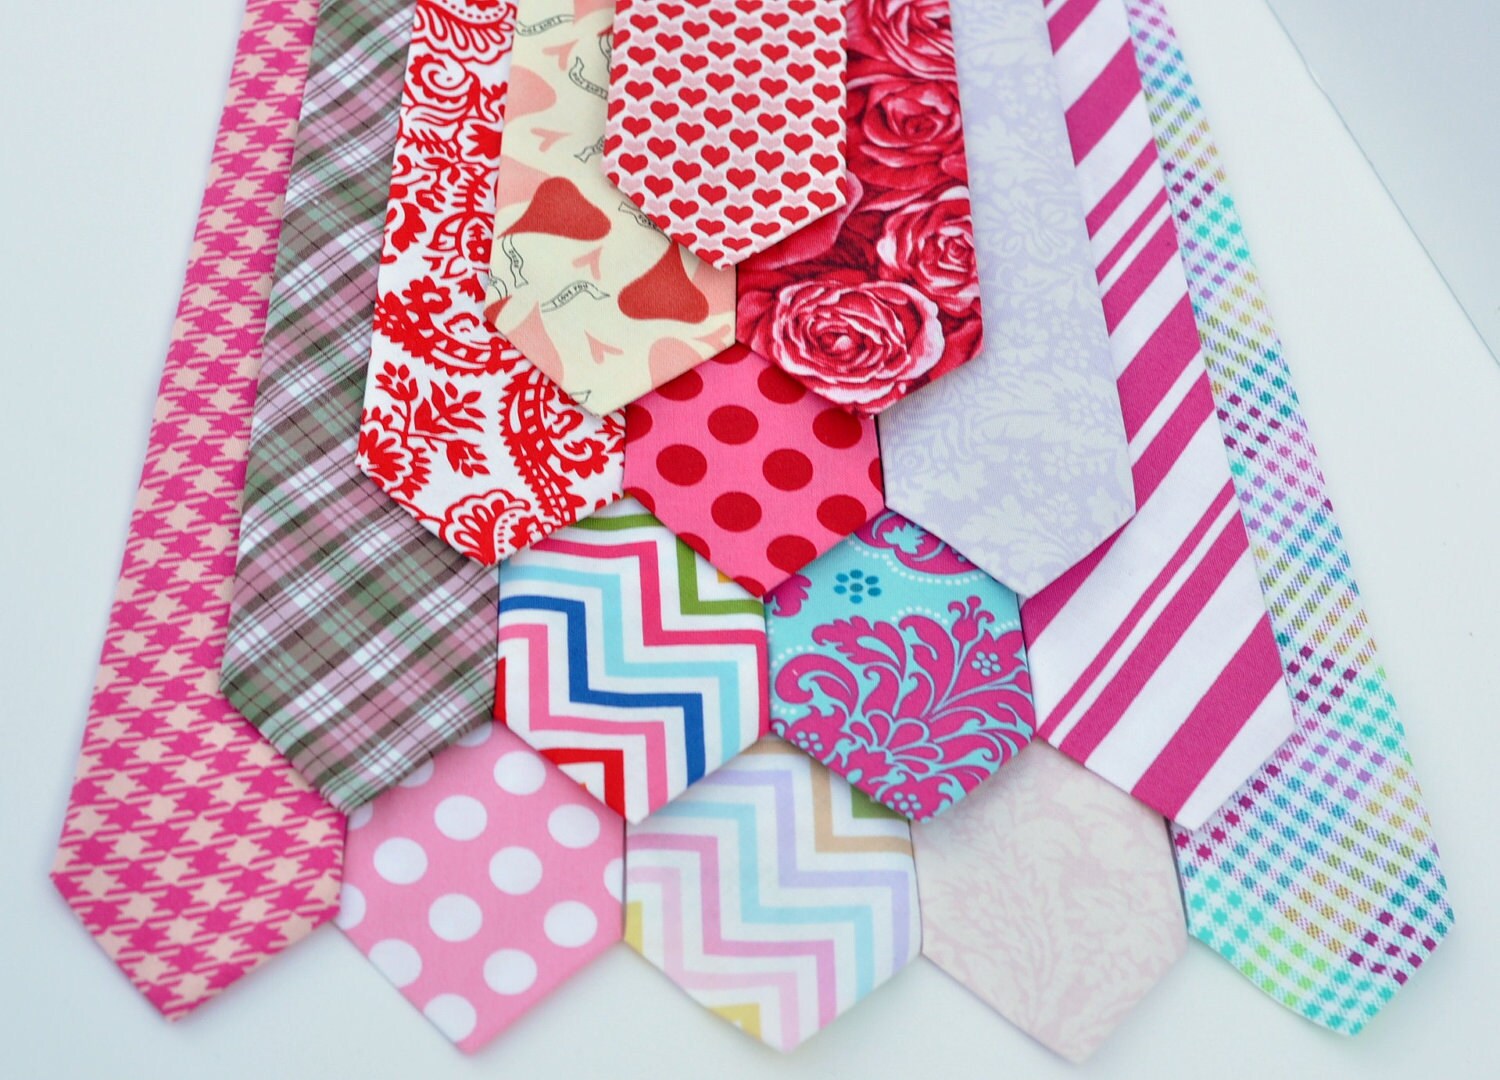
Ties for Big and Little Guys, by Me and Matilda
Wednesday, January 18, 2012
REFURB-RECON-REPURPOSE: old suitcase, new doll case
I've always loved the idea of making something old, new again, and when I saw these on Etsy, I knew I could easily do it myself.... and then, the hunt was on for the perfect case....
And, I found one....
Actually, Mr. Monkey found it on his very first trip with the girl-babe and I, to our nearest Bibles for Missions thrift store. This pretty blue case was sitting on the floor with a bunch of other sad looking cases.... a diamond in the rough for sure....
The price tag.... a WHOPPING $3.00! Yes, folks, this was the steal of the day!
So here it is.... the transformation....
I had so much fun whipping up this project! In total, it took me about 4 and a half hours.... well worth my time and effort just to get that HUGE smile from that BEAUTIFUL girl....
I think, later-later, I'll add some clear pockets to the top to house the socks and shoes, and maybe paint the monkey's name on the outside.... I'll be sure to add that as a REFURB-RECON-REPURPOSE post too!
I hope this inspires you glue-gun toting craft-goddesses to tackle your own repurpose projects. Have a lovely day my friends ;)
And, I found one....
Actually, Mr. Monkey found it on his very first trip with the girl-babe and I, to our nearest Bibles for Missions thrift store. This pretty blue case was sitting on the floor with a bunch of other sad looking cases.... a diamond in the rough for sure....
The price tag.... a WHOPPING $3.00! Yes, folks, this was the steal of the day!
So here it is.... the transformation....
| original condition, ok, but, not really... and still has it's keys! |
| let the stripping begin - woo-hoo!!! |
| interesting.... butter cookie packaging as backing.... repurposing, I LOVE IT! |
| original lining stuck.... ah, no biggie |
| completely NAKED! |
| vintage sheeting fabric, batting, glue gun, and many-many-many glue sticks |
| pretty trims, not sure what to use just yet.... |
| fitting and gluing the batting, really just winging it....until.... |
| OUCHIE! why does this ALWAYS happen to me? |
| burnt fingers forgotten.... bottom lining finito! |
| glue and press, glue and press.... top lining also finito! |
| cutting, trimming, fitting and attaching the pretty flowers |
| oops, forgot to take a shot of the trim being applied, my bad, here it is finished |
| the monkey-girl throwing in Bear's clothes before I could finish, love her excitement |
| 'take a pitcher of me, mommy!' (heart melting) |
| DONE! and PACKED! |
I think, later-later, I'll add some clear pockets to the top to house the socks and shoes, and maybe paint the monkey's name on the outside.... I'll be sure to add that as a REFURB-RECON-REPURPOSE post too!
I hope this inspires you glue-gun toting craft-goddesses to tackle your own repurpose projects. Have a lovely day my friends ;)
Labels:
crafts,
fun,
inspiration,
lovely things,
re-construct,
re-furbish,
refurb-recon-repurpose,
thrifting
Sunday, January 15, 2012
FAMILY DAYS: production line
For Christmas, my middle monkey made me a button bracelet from the pretty buttons in my button stash. I saw the bracelet about a month before Christmas; but, had no idea it was for me. He put it together using a caramel coloured pipe cleaner and some shiny metal buttons (his favourites).
On Christmas morning, he handed me a pretty little box that he carefully wrapped himself. On top was the cutest little tag that was made from a thick piece of golden wrapping paper that he hand cut and folded.... on the inside it simply said, 'To: Mom. From: Marek' with a sweet happy face. My heart gushed and I had to hold back the tears.... I mean, really, I hadn't even opened the gift yet; but, I knew I would cherish it forever....
So, in his ultimate wisdom, and I'm sure after days of processing my tearful thank you to him, he came to me and said, 'I want to make button bracelets for our yard sale. Because if you like yours so much, so will other Mommy's.' My heart exploded, and I knew, even more than I had ever known before, that these moments were the reason I wanted to be a Mom.
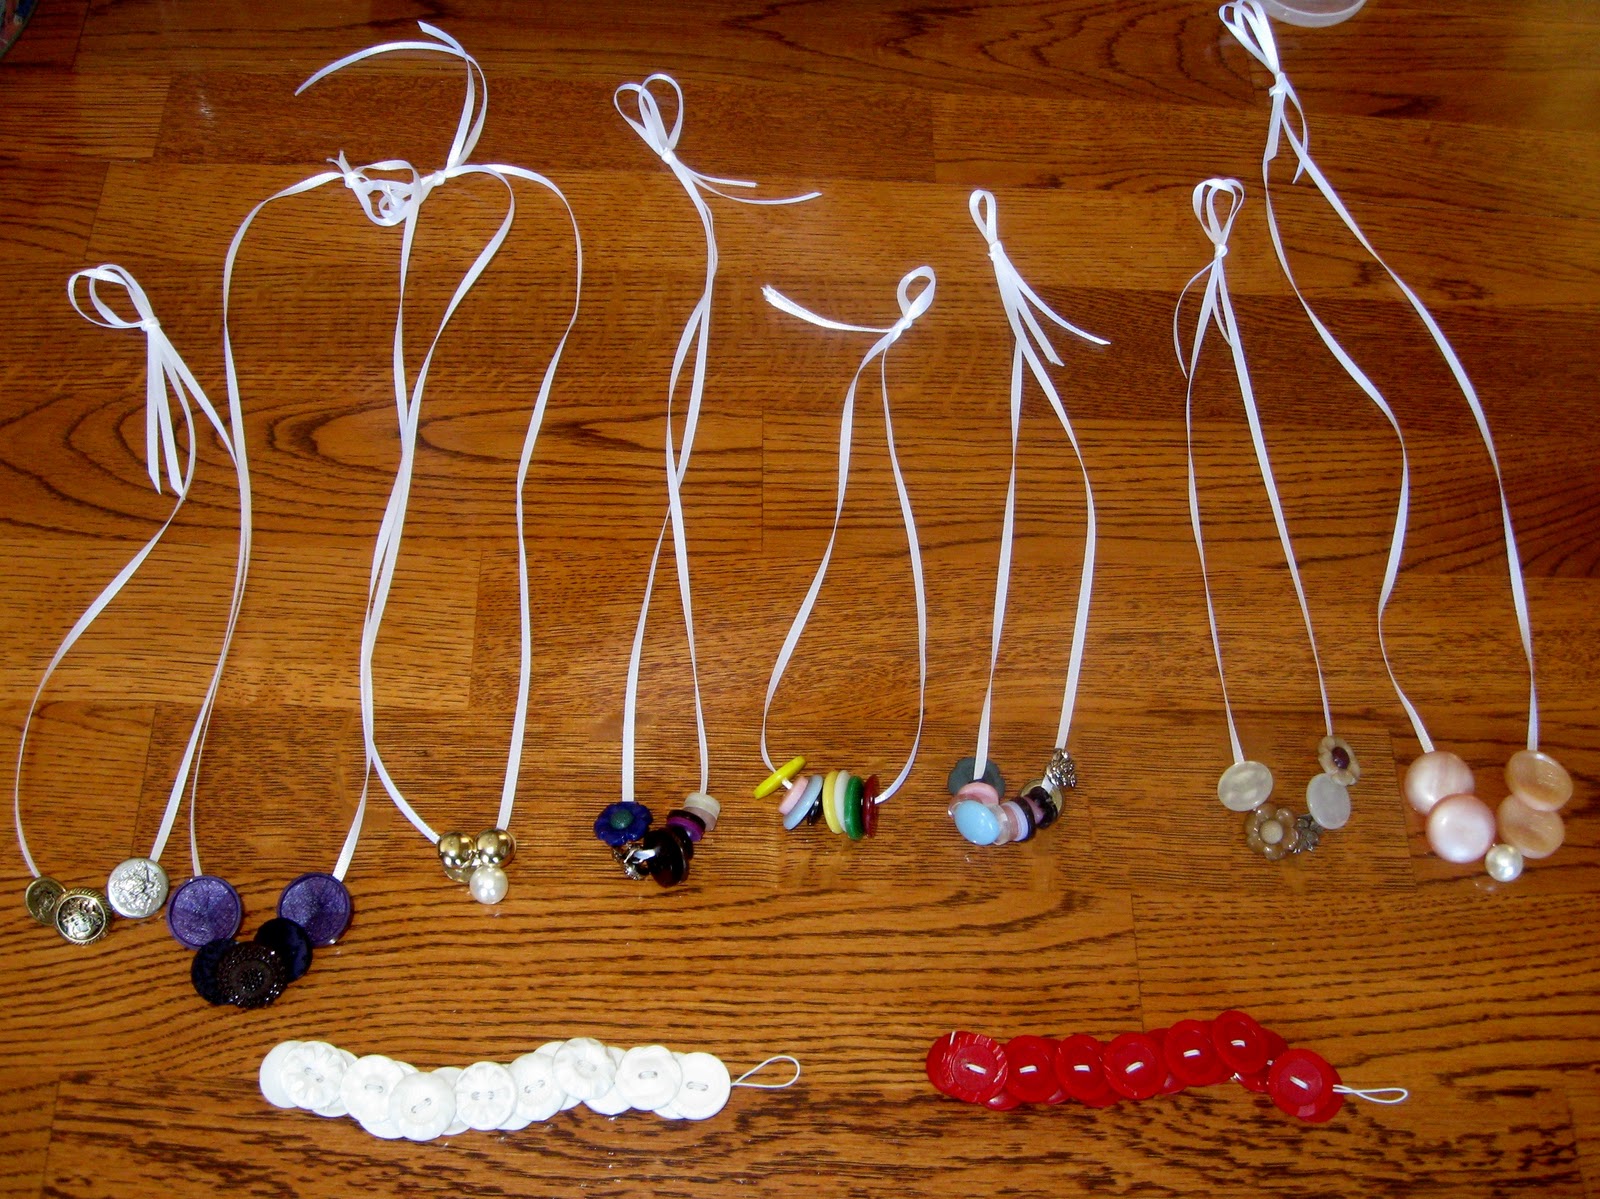
And today, on this frigidly cold Sunday, we decided to start production in the button factory. I'll I just say this.... I was in my crafty glory, sitting with my three monkeys, working away, watching them sort through the ga-zillions of buttons we have.... These pretty necklaces and bracelets are the fruits of our efforts today....
For girls; pretty ribbon and button necklaces made by the hands of my two boy monkeys, with help picking colours from the girl-babe; and elastic threaded bracelets made by Mommy. My oldest monkey had the brilliant idea to make army man necklaces for boys.... so this week we'll be taking a trip to the dollar store for some army men and hemp lacing....
I love that they want to have their own sale table for our annual community yard sale. I love the initiative, and the excitement they feel over doing something for themselves; and the pride they have in their ideas and finished product....
They make me love them more and more every. single. day.
Happy family day everyone ;)
p.s. stay tuned, we're back in the swing of things here on the blog.... starting tomorrow!
On Christmas morning, he handed me a pretty little box that he carefully wrapped himself. On top was the cutest little tag that was made from a thick piece of golden wrapping paper that he hand cut and folded.... on the inside it simply said, 'To: Mom. From: Marek' with a sweet happy face. My heart gushed and I had to hold back the tears.... I mean, really, I hadn't even opened the gift yet; but, I knew I would cherish it forever....
So, in his ultimate wisdom, and I'm sure after days of processing my tearful thank you to him, he came to me and said, 'I want to make button bracelets for our yard sale. Because if you like yours so much, so will other Mommy's.' My heart exploded, and I knew, even more than I had ever known before, that these moments were the reason I wanted to be a Mom.
And today, on this frigidly cold Sunday, we decided to start production in the button factory. I'll I just say this.... I was in my crafty glory, sitting with my three monkeys, working away, watching them sort through the ga-zillions of buttons we have.... These pretty necklaces and bracelets are the fruits of our efforts today....
For girls; pretty ribbon and button necklaces made by the hands of my two boy monkeys, with help picking colours from the girl-babe; and elastic threaded bracelets made by Mommy. My oldest monkey had the brilliant idea to make army man necklaces for boys.... so this week we'll be taking a trip to the dollar store for some army men and hemp lacing....
I love that they want to have their own sale table for our annual community yard sale. I love the initiative, and the excitement they feel over doing something for themselves; and the pride they have in their ideas and finished product....
They make me love them more and more every. single. day.
Happy family day everyone ;)
p.s. stay tuned, we're back in the swing of things here on the blog.... starting tomorrow!
Labels:
crafts,
environmentally friendly,
family,
family days,
for the kids,
fun,
life,
lovely things,
monkeying around
Monday, December 19, 2011
COUNTDOWN: five
F-I-V-E, FIVE! 5 shopping days left!
The excitement is building, and the stress levels are rising.... oh no, oh no, you still have a few people to buy for, what will you do?
How about one of the easiest, most personalized gifts ever? What could it be, you ask? Well, I'll tell you....
Make personalized labels for a few of your recipients favourite things. For example, if you were going to do an inexpensive bath and body basket, you would buy soap or body wash, some bath fizzies, a body puff (or if you're a man a soap activator, as my husband calls them), and maybe a bottle of lotion.
Remove all of the commercial labeling (if possible), take some pretty paper (or plain) and create your own labels that are personal to your recipient.... give the soap an update with a nice wrapper, slip the bath fizzies into a clear plastic treat bag and attach a matching hang tag, also use a hang tag to attach to the body puff, and create a new label to slip over the commercial lotion bottle label.
What could be easier?
It's personal. You know the recipient already likes the products. It can be relatively inexpensive. A-and! It was made by you.... sort of....
Thanks for stopping by! Have a lovely day ;)
Sunday, December 18, 2011
COUNTDOWN: six
6 shopping days left! You heard me, SIX!!
I love crocheting, betcha knew that though.... Aaaanyway, if you know a few basic crochet stitches, you can make some quick, easy, and useful gifts....
It's ba-ack! The POT SCRUBBIE! Yes, people, the pot scrubbie.
Anyhow, the basic pot scrubbie is simply two circular, single crocheted coasters sewn together. That's it. Revolutionary?... Again, no.
If you aren't into giving pot scrubbies as gifts, give them (single thickness) as coasters. And, if you don't know how to crochet, you can make coasters using just about any kind of cloth you can get your hands on, hand stitch or use your sewing machine to sew together sandwiched fabrics; or use 4" x 4" tiles and mod podge pretty scrapbook paper to them, then attach little cork or felt pads to the bottoms.... Super simple!
Give it a try! Your gift recipient will love them!
Have a super day ;)
Labels:
Christmas Countdown,
crafts,
crochet,
environmentally friendly,
for the home,
gifts,
yarn
Friday, December 16, 2011
COUNTDOWN: eight
Only EIGHT.... count 'em, EIGHT, shopping days left! 1-2-3-4-5-6-7.... ummmm, 8!
For the young people in your life... There's nothing better than rolling, squishing, and molding play dough. It's a fantastic material that sparks creativity in children and adults alike.... AND! Bonus.... is so very simple to make big batches yourself!
Another project pulled from 3 monkeys archives....
Snowflake Play Dough,
first posted here in winter 2009....
| Sorry for the poor quality photo; but, it's hard to capture sparkles :P |
2 cups white flour
1 cup table salt
2 tablespoons cream of tartar (what else do you use this strange stuff for????)
1 tube of white, pink or light blue opalescent glitter (I used about a 1/4 of a cup, but certainly use your own discretion for this part)
In another bowl/measuring cup/or some sort of liquid holding vessel, combine:
2 cups boiling water
1 tablespoon of oil
Add liquid to dry ingredients and mix well. Depending on what it feels like after all of your ingredients are mixed, you may need to add more flour if too smushy or more oil of too dry. Once it has cooled enough to hold, kneed it together until it feels smooth. Then package it in freezer bags or wrap it in plastic wrap. VOILA! Pretty sparkly "Snowflake" Play Dough.
Alternatively; you can omit the glitter(or not) and add liquid food colouring (with the liquids, of course), or two packages of kool-aid (for colour) to the dry ingredients. I use neon liquid food colouring and it makes very vibrant coloured play dough (and hands while making it)... the kool-aid makes nice pastelly colours with a great smell. For very intense colours, you can try sourcing out powdered food colouring. If there is a cake decorator in your area, they may be able to hook you up with powdered/paste food colouring sources.
Package this together with a short, thick dowel that can be used as a rolling pin, a bunch of fun cookie cutters and wooden craft sticks to use as knives to cut the dough.
Super easy gift that is sure to please!
Have a lovely day.... ;)
Wednesday, December 14, 2011
COUNTDOWN: ten
Only ten shopping days left til the big man appears!
We'll be counting down from today until the 24th by sharing some simple, quick and heartfelt last-minute gift giving ideas....
LAST-MINUTE IDEA #10:
From 3 monkeys archives, the I LOVE YOU JAR.
A super simple little gift that tells someone exactly how you feel about them. A project that for me, takes the place of and is more doable than scrapbooking. Whenever I see my children do something new, or funny, or we create another special family memory.... I jot it down and slip it into the jar.... easy-peasy!
All you need is a jar (I love vintage canning jars), pretty scrapbook papers, assorted markers, scissors and your favourite memories, feelings and thoughts about the recipient.
You could also adapt this to create smile jars (jokes), inspiration jars (uplifting quotes).... the possibilities are limitless.... give it a try.... a simple, from the heart gift that will be cherished for a lifetime.
Have a great day everyone.... HO-HO-HO! ;)
Labels:
Christmas,
Christmas Countdown,
crafts,
family,
gifts,
holiday,
inspiration,
lovely things
Sunday, December 11, 2011
FAMILY DAYS: craft show
While daddy is working away keeping people safe, the monkeys and I will be going to a 'Giant Craft Show' in our little town.
We've never been before, so it should be fun.... I have one monkey (the oldest) who really doesn't want to go; however, once he gets there I'm sure I'll be hearing a lot of "can you buy this for me?".... the middle monkey, is just like me, he loves anything crafty-artsy-handmade (that's how I know we were meant to be).... and well, the monkey-babe, she just tags along and will undoubtedly be 'hands-on' with EVERYTHING....
One thing's for sure, it will be an adventure - and one that I am happy to share with three out of four of the peeps I love most in this world....
Have a happy, happy family day my lovelies ;)
We've never been before, so it should be fun.... I have one monkey (the oldest) who really doesn't want to go; however, once he gets there I'm sure I'll be hearing a lot of "can you buy this for me?".... the middle monkey, is just like me, he loves anything crafty-artsy-handmade (that's how I know we were meant to be).... and well, the monkey-babe, she just tags along and will undoubtedly be 'hands-on' with EVERYTHING....
One thing's for sure, it will be an adventure - and one that I am happy to share with three out of four of the peeps I love most in this world....
Have a happy, happy family day my lovelies ;)
Monday, December 5, 2011
HOW-TO-TUESDAY: dryer balls
Yesterday, I decided to try my hand at making homemade dryer balls, there are numerous tutorials all over the Internet.... For those of you who don't know what they are, they are exactly what they say they are; balls that go into the dryer.... Oh, you mean WHATare they for... GOTCHA!
Homemade wool dryer balls are felted wool balls that you use in your dryer (with your laundry) to help eliminate static, speed up drying time (almost by half!) and soften your clothes without the use of chemicals. I know, they sound too good to be true, don't they?
Well, they do in fact work! And, AND! You can make them yourself.... A-and! I'm going to show you how!
Here's what you'll need to get started:
100% wool yarn
(scraps, new, coloured, non-coloured, but definitely cheap and NOT washable.... washable does not felt)
crochet hook or tapestry needle
socks or nylons
cotton or acrylic yarn or thread
Step one: Start winding the core of your dryer ball around your fingers like so.... Oh, and I used the jar to keep my scrap yarn from rolling away from me, this also works great for when you're knitting or crocheting....
Step two: Start winding the yarn across your first few strands, very tightly, like this....
Step three: Wind, wind, wind.... keep winding....
Step four: Keep winding, then tuck in your end, til you end up with a nice firm-ish inner core of wool.... Size, you ask? Whatever size you like.... mine pictured below were about 2 inches across....
Step five: Take your wool yarn (for the outer portion of this ball I used wool roving, it felts very quickly and easily) and start winding.... For this step, I try not to wind the outer wool quite as tight.... it's still tight, just not loose-y-goose-y....
Step six: Wind, wind, wind, until you've reached your a little larger than your desired size, remember this ball will shrink.... then tuck in your end....
Step seven: Here's where the socks or nylons come in.... I used some old baby socks, and slipped them over my yarn balls....
Step eight: Then took my NON-WOOL, NON-FELTING yarn and tied them into cute little packages like so.... Threw them into the washer with my whites, which I washed using hot water.... then dried, still in the socks....
Step nine: Finito! Here are your felted dryer balls.... If you feel they need another wash, go right ahead, it doesn't hurt to run them through the wash more than once just to ensure you don't end up with a matted mess in your dryer....
Now, go enjoy drying your laundry in a very eco-friendly way!
These also make a fantastic housewarming gift to give with some great eco-friendly detergent.... or make them in a rainbow of colours and give them to some lucky baby to play with....
Have a great day folks ;)
Homemade wool dryer balls are felted wool balls that you use in your dryer (with your laundry) to help eliminate static, speed up drying time (almost by half!) and soften your clothes without the use of chemicals. I know, they sound too good to be true, don't they?
Well, they do in fact work! And, AND! You can make them yourself.... A-and! I'm going to show you how!
Here's what you'll need to get started:
100% wool yarn
(scraps, new, coloured, non-coloured, but definitely cheap and NOT washable.... washable does not felt)
crochet hook or tapestry needle
socks or nylons
cotton or acrylic yarn or thread
Step one: Start winding the core of your dryer ball around your fingers like so.... Oh, and I used the jar to keep my scrap yarn from rolling away from me, this also works great for when you're knitting or crocheting....
Step two: Start winding the yarn across your first few strands, very tightly, like this....
Step three: Wind, wind, wind.... keep winding....
Step four: Keep winding, then tuck in your end, til you end up with a nice firm-ish inner core of wool.... Size, you ask? Whatever size you like.... mine pictured below were about 2 inches across....
Step five: Take your wool yarn (for the outer portion of this ball I used wool roving, it felts very quickly and easily) and start winding.... For this step, I try not to wind the outer wool quite as tight.... it's still tight, just not loose-y-goose-y....
Step six: Wind, wind, wind, until you've reached your a little larger than your desired size, remember this ball will shrink.... then tuck in your end....
Step seven: Here's where the socks or nylons come in.... I used some old baby socks, and slipped them over my yarn balls....
Step eight: Then took my NON-WOOL, NON-FELTING yarn and tied them into cute little packages like so.... Threw them into the washer with my whites, which I washed using hot water.... then dried, still in the socks....
Step nine: Finito! Here are your felted dryer balls.... If you feel they need another wash, go right ahead, it doesn't hurt to run them through the wash more than once just to ensure you don't end up with a matted mess in your dryer....
Now, go enjoy drying your laundry in a very eco-friendly way!
These also make a fantastic housewarming gift to give with some great eco-friendly detergent.... or make them in a rainbow of colours and give them to some lucky baby to play with....
Have a great day folks ;)
Labels:
cost cutters,
crafts,
environmentally friendly,
how-to-tuesday,
toys
Friday, November 25, 2011
PINTERESTINGLY INTERESTING: Kids Christmas Crafts
Craft stick tree. Via.
Be sure to check out Pinterest for other great crafty ideas you can do with your kids!
I know this is usually my Thursday post, but I couldn't resist sharing some little crafty bits I found.... hope you have fun with your littles creating some new decorations full of fond memories ;)
Have a great Friday!
;)
Labels:
Christmas,
crafts,
family,
pinterestingly interesting
Tuesday, November 8, 2011
HOW-TO-TUESDAY: t-shirt bracelet tutorial
- old t-shirts
- needle (sewing machine optional)
- coordinating (or not) thread
- scissors
- safety pin
Have a great day everyone ;)
Labels:
crafts,
fun,
how-to-tuesday,
lovely things,
sewing,
tutorial
Subscribe to:
Posts (Atom)